PHOTOGRAPHY EXPOSED
PHOTOGRAPHY EXPOSED
by John Peters A.R.P.S.
PAINT.NET
1. GENERAL SELECTION The first function in our list.
The Magic wand. A tool for general selection of 'similar' pixels.
First, we should download the image we are to use in this example. It wiill probably be saved in your DOWNLOADS folder.
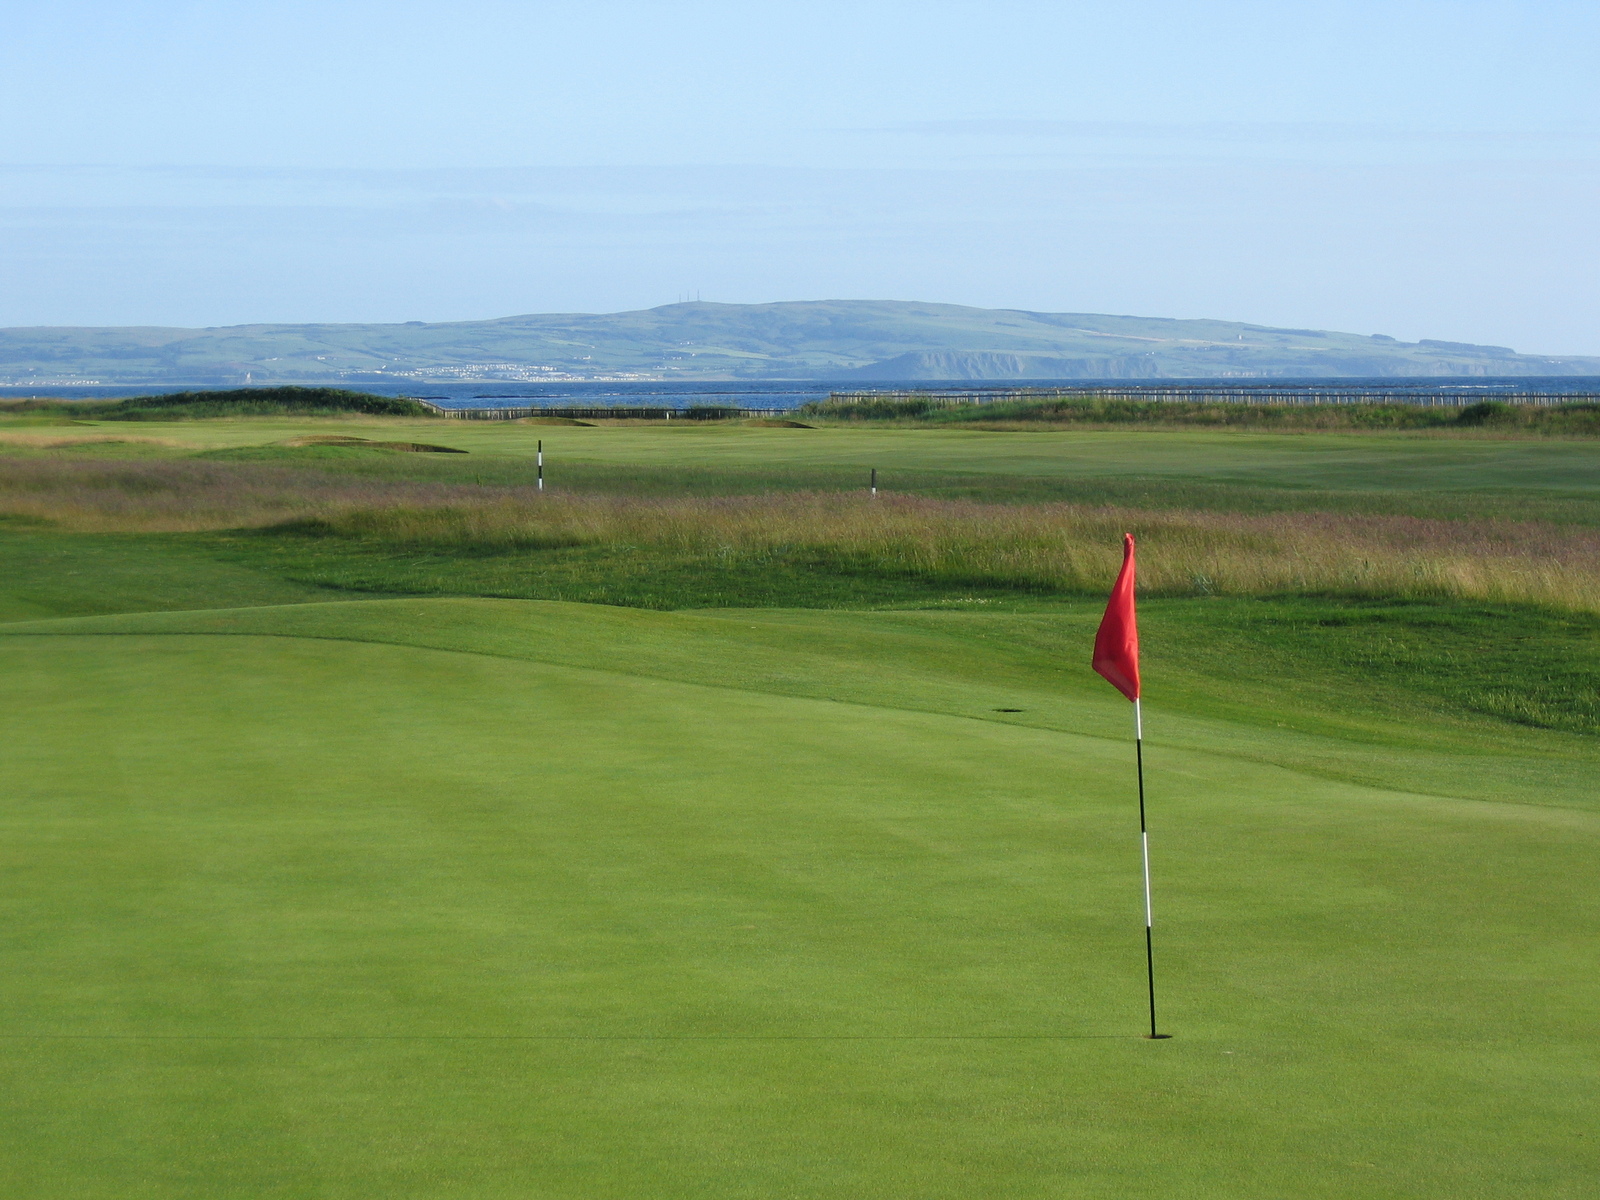
Download the image with a sky for general selection.
Once downloaded, we first open the image as the background or main image. Load PAINT.NET, then using the menu at the top left: FILE / OPEN, select your downloaded file from DOWNLOADS and open the file called "paintselectsample". Notice how Paint.net names the image or first layer as 'background', see at the bottom right of Paint.net as shown below.

TOP TIP When editing, it sometimes pays to enlarge the photograph you are working on. Use "Ctrl & +" together to enlarge, "Ctrl & -" together to reduce the image in size.
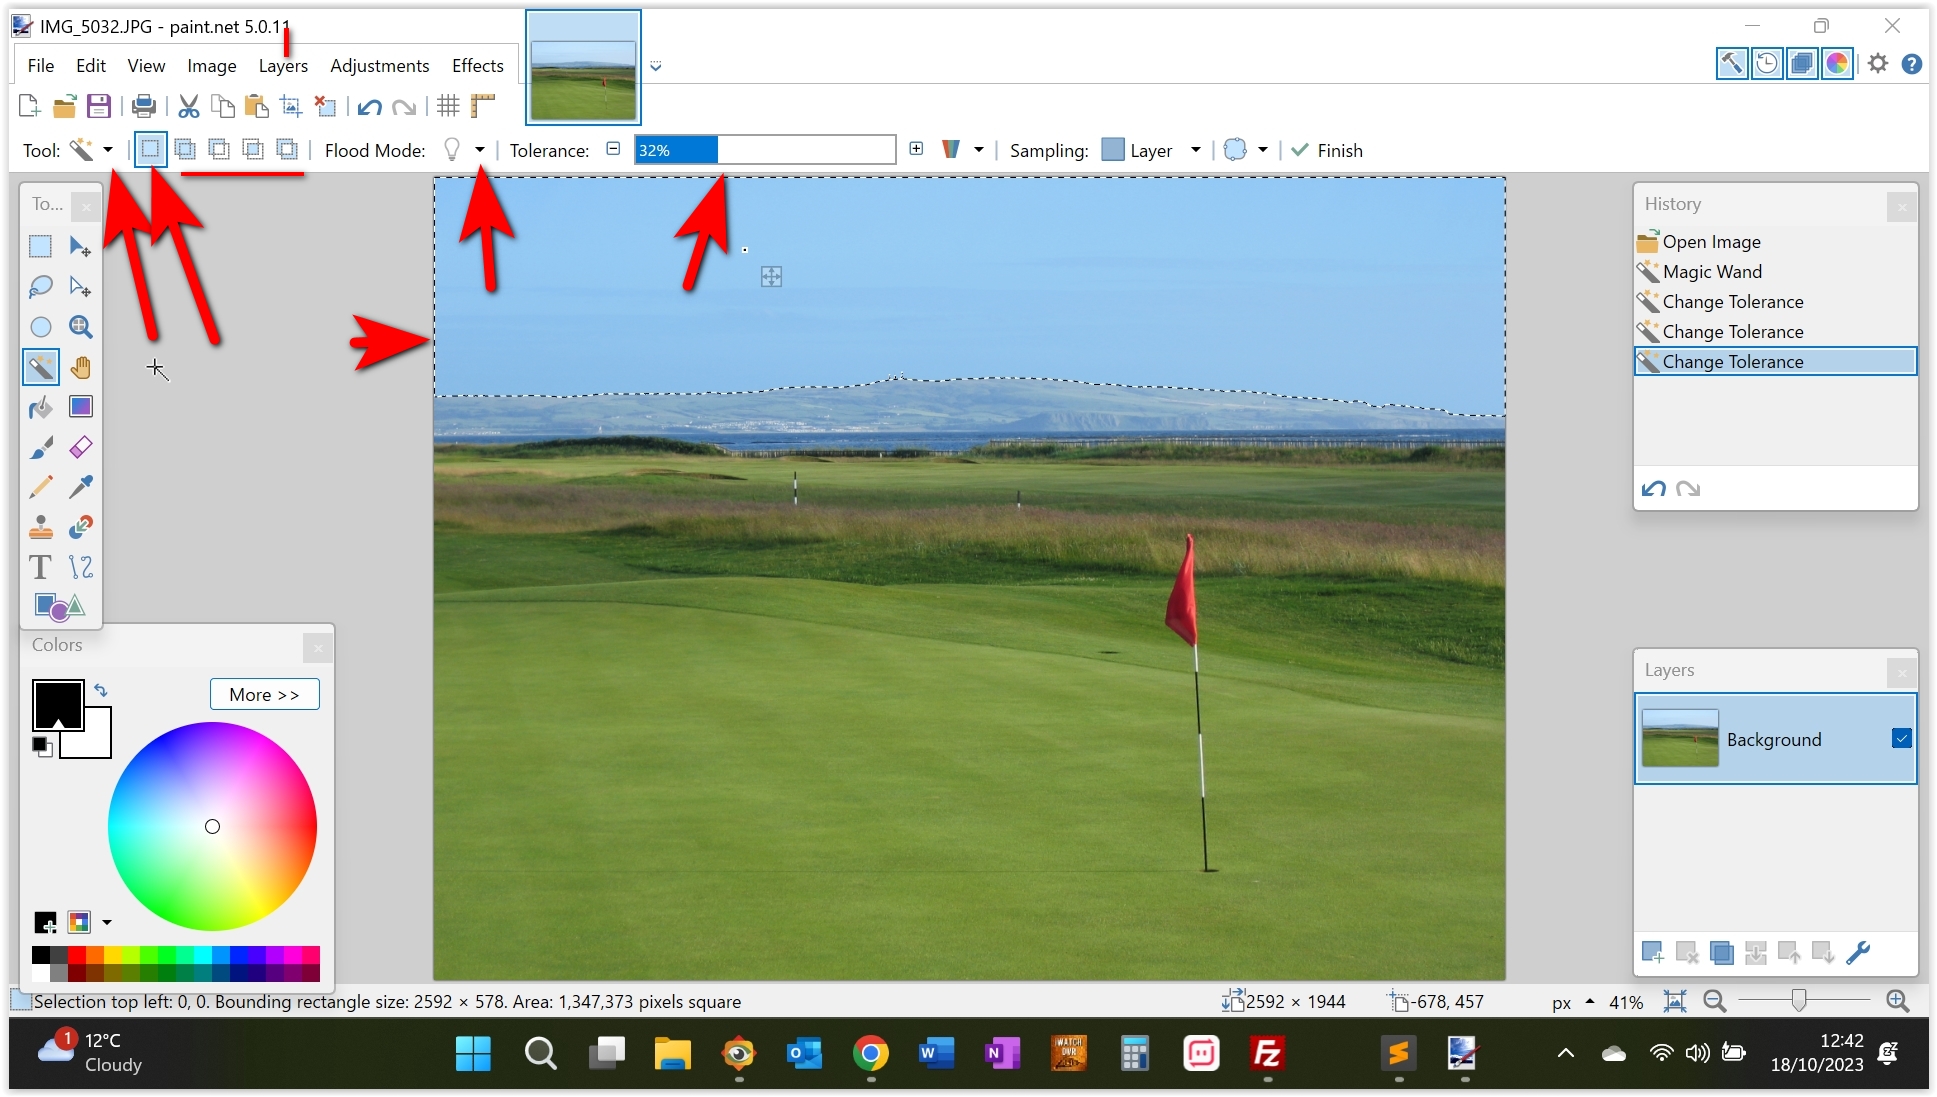
You can see in the photo below, the sky area is selected (surrounded by 'marching ants' in a live version). You will also see the settings used for the 'Magic Wand' tool.
In this example, I wanted to select the sky area in the photo below which has a sky all of a similar colour and density. The tool is in REPLACE mode, but you should try the arrow down key for the tool and cursor over the other modes to see what they are. Using a combination of modes in conjunction with tolerance, general selection can be adjusted for a variety of shapes.
Try them for fun, no harm done. I found a TOLERANCE setting of 32% suitable for selecting the sky area but it may be different on your setup. After setting a tolerence of 32, and with magic wand tool selected, just click with cursor in the sky area.
Try altering the TOLERANCE setting, become familiar with how it works. The arrows on this photograph point to the controls referred to earlier. By using the tolerance control, add mode and subtract mode, you can make general selections. The red underline is used to indicate several of the adjustments that can be made to the MAGIC WAND.

TOP TIP When editing, it sometimes pays to enlarge the photograph you are working on. Use Ctrl & + together to enlarge, Ctrl & - together to reduce.
I often use AFFINITY PHOTO for complex selections, you can't beat a selection by pixel, point n click. If anywhere, that's perhaps where the likes of FASTSTONE and PAINT.NET could be improved. Having said that, these products still have reasonably flexible selection methods.The best thing to do is experiment with PAINT.NET
Try all the options, select all the adjustments, it costs nothing to muck about. Using 'add' and 'subtract' modes combined with the other modes and 'tolerance' mode, it's surprising what complex shapes can be selected.
Having selected our sky, we can easily delete it, replace it, apply a similar effect as that of a graduated filter and more, creativity is your only obstacle. Try one of the links below.
2. UNDERSTANDING LAYERS
3. GENERAL BLENDING
4. REPLACE SKY
5. REPLACE A BACKGROUND
6. MAKE AND USE PAINT.NET TO CREATE THE EFFECTS OF AN 'ND' (NEUTRAL DENSITY) FILTER
7. MAKE AND USE PAINT.NET TO ADD A GRADUATED LAYER OF COLOUR OR GREY (ND)
8. SELECT A SPECIFIC AREA TO APPLY AN EDITING FUNCTION
9. ADD MOTION BLUR
10. ADD A VIGNETTE

